
One major issue in making the map of the Embers was creating transparent layers. I wanted my map to have borders reminiscent of John Speed‘s wonderful maps, but the process of OpenSeadragon-ing with transparent pngs can be tricky.

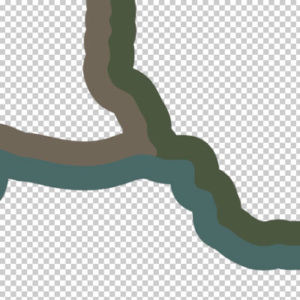
Look at the map above. The borders are essentially at 50% opacity. You don’t lose detail beneath them and I feel they blend well into the map, especially for my mood setting-first approach.
At the time of writing, there’s a bug in OpenSeadragon which causes a slight overlap apparent in layers made from transparent images, even when overlay=0 in your dzi file. Thankfully this bug has been fixed in the master branch, but it isn’t released quite yet.

Regardless, I believe best practice when you need transparent layers is to make your shapes/images at 100% opacity with transparent backgrounds, and manage opacity in your OpenSeadragon tileSource settings:
So, how to do that.
Borders with libvips: Labor of Love, Emphasis on Labor.
In my previous post, I showed an easy way to compose large images from smaller tiles using ImageMagick, but here the mogrify process will convert transparency to white. You can reverse this, but you’re left with pixel residue. There are ways to work around that, but if I wanted fuzzy borders, I would have drawn them that way.
libvips is the superior tool here. On my todo list is writing a script to automate this process in libvips, but at the time I was dumb and just wanted to finish my map. The process below is for those who might have trouble scripting this process but still want a map. More time for you to learn about brilliant worldbuilding minutia like albedo.
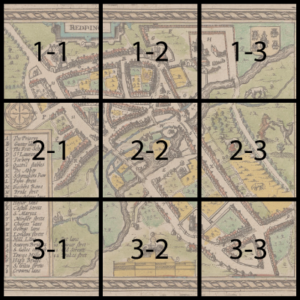
In your Illustrator/Photoshop/GIMP file, hide all non-border layers. Unlike my previous post, we can’t use ImageMagick, so you can’t svg > png. You have to save your border tile artboards as png manually. I found naming them cartesianally (see below) helps keeping your mind straight, and I’ll use this methodology below.
Documentation on merge is here. In terminal, navigate to where vips.exe lives, and run the following:
$ vips merge c:\1-2.png c:\1-1.png c:\row1output1.png horizontal 3000 0
The order might seem counterintuitive; vips is saying, “give me the image you want to add (1-2.png), and then the source you want me to add it to (1-1.png)”. Merge horizontally, and the position you want the “added” image offset. In my case, tiles are 3000×3000, so I want 1-2.png offset 3000 pixels from (0,0) of my source 1-1.png.
Thus, to get the 1-3.png added:
$ vips merge c:\1-3.png c:\row1output1.png c:\row1output2.png horizontal 6000 0
Once you’ve reached the end of your row, I recommend starting a new row from scratch with the above method. That way if you enter the wrong coordinates you only have to fix or redo that row.
Once you have all your complete row images, merge them vertically:
$ vips merge c:\row2.png c:\row1.png c:\outputrows12.png vertical 0 3000
Repeat as necessary.
You can save some time by skipping empty spaces, as merge will fill this in. My map’s artboards aren’t a perfect grid:

So when I got to my third row, I offset the third row 6000 down and 3000 over:
$ vips merge c:\row3.png c:\rows1and2.png c:\rows123.png vertical 3000 6000
Once you have your transparent border layer, run dzsave normally (using –suffix .png to maintain file format), and you’ll have a transparent dzi.
If you now want the opaque elements of your transparency layer to appear somewhat transparent in OpenSeadragon, include the opacity option in tileSources:
...
tileSources: [
{
  tileSource: 'dzi/basemap.dzi',
  opacity: 1
},
{
  tileSource: 'dzi/borders.dzi',
  opacity: 0.5
}
...
Lastly, as this process is laborious and less than ideal, if your transparency layer is smaller than your base maps, you can position it with x and y, though if the layer doesn’t match the width of the base dzi, you’ll need to position it using width and height or it will stretch to match. You can read more about this here. For example:
...
{
  tileSource: 'dzi/borders.dzi.',
  opacity: 0.5,
  x: 0.33,
  y: 0.75,
  width: 0.2,
  height: 0.25
}
...